Note: Wireless connections with Android Gateway are not recommended for continuous testing, as Wi-Fi connections are not as stable as wired connections.
Set Up the Connection
Note that the Android device must be on the same Wi-Fi network as the host machine running Android Gateway.
- Open Android Gateway.
- Connect your phone to the computer running Android Gateway using a USB cable.
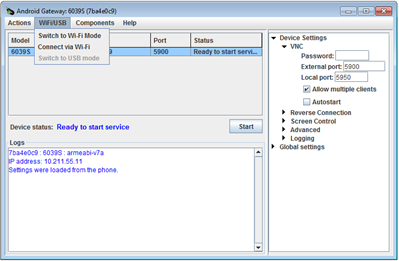
- From the WiFi/USB menu, select Switch to Wi-Fi Mode. You can also specify the port to use on the device here.

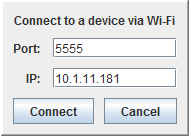
- Select Connect from the box that pops up:

-
When Android Gateway establishes a wireless connection to the device, it displays in the Device Table, but with its IP address in place of its serial number. At this point, you can disconnect the device from the USB cable.
Note: The first time you connect to Android Gateway using Wi-Fi, two connections to the device will display until you disconnect the device from the USB port.
- Click Start to begin the Android Gateway service.
- You can now connect to the device in Eggplant Functional. Use the IP address that displays in the Device Status field.
- To return the device to USB debugging mode, reconnect it to the USB cable. From the WiFi/USB menu, select Switch to USB Mode.